

New Goodies!
Happy Saturday Everyone! I'm so thrilled with our new Primitive Angel Art Doll Kits! Though the bases are "primitive", the design possibilities are anything but! Things all started with a customer request for Primitive Angels, and I ran with it! They were fun to design and even more fun to play with! In addition to the new goods, the general Christmas Section has over 600 fabulous goodies (all on sale) and our Coffee Break Design Christmas Section is sure to inspire.

Art Time!
I had TONS of fun playing with the new Primitive Angel Dolls! Here are the supplies I used:
Medium Primitive Angel Dolls Style 4,5, and 6, Sculpey III White, Art Doll Face Mold, Glasses Cut-Outs, Flower Pin Set, Fairy Head Paper Cuts Angels and Saints, Diamond Glaze, Inka Gold Turquoise and Graphite, Glue N Seal Matte, Vintage Bottle Cap, Peerless Water Colors Complete Edition Book, Vintage Sheet Music, Retro Pattern Grunge Collage Sheet, Signo Pens Black and White, Heart Cut-Outs, Silver Wire
Medium Primitive Angel Dolls Style 4,5, and 6, Sculpey III White, Art Doll Face Mold, Glasses Cut-Outs, Flower Pin Set, Fairy Head Paper Cuts Angels and Saints, Diamond Glaze, Inka Gold Turquoise and Graphite, Glue N Seal Matte, Vintage Bottle Cap, Peerless Water Colors Complete Edition Book, Vintage Sheet Music, Retro Pattern Grunge Collage Sheet, Signo Pens Black and White, Heart Cut-Outs, Silver Wire
Even though they are "primitive" my inspiration was to make them fun and funky! My main focus was the heads. I wanted to do something different for each, something more asseblagey (yes, I know that isn't a real word.. grin). So that I where I started. And then I just winged the rest as I went along (pardon the pun!). The heads of the dolls are larger, and much more round then the heads of our other dolls making them perfect for assemblagey things. You can still use the Doll Head Paper Cuts on them, but I wanted to challenge myself a bit. My first challenge was using clay and molds for the first time! Something that proved to be a piece of cake! Really! I've wanted to try it for so long, and it was a breeze.

Initially, I thought I would use Paperclay, which would definitely work too. But then I noticed the long drying time so I went with the Sculpey. Taking it out of the package, it was pretty soft. I've always heard of "conditioning" clay, so I did smush it around for few minutes. Probably not necessary, but doesn't hurt either. I tore off some clay about the size of my first mold cavity and simply pushed it in using my thumbs. I think it's best to add more than necessary, and then subtract as needed. I didn't want any hanging over. You can add or subtract clay as needed without trouble. The stuff is so easy to work!

Once my cavity was full, I found it very handy to push the back down on a flat surface. This gave me a nice, smooth cabochon back!

See, nice and flat. Then I just popped it out of the mold. It came out no problem!

I loved that the clay was not so soft that I felt like I would ruin it or smash it. And yet was still pliable enough to make any necessary changes. It was just right!

Once I saw how easy the process was, I made several more. Remember to push the back on a flat surface before popping them out! I was so happy to figure that out!

Finally bake for 12 minutes as directed on the package. I simply put mine on a paper plate. Not certain how "safe" that is, however I kept a close eye on them. And they came out perfectly.
Chris called me while they were cooking and I had to laugh after I told him "I'm baking faces." He didn't even sound surprised or question it. Ha!
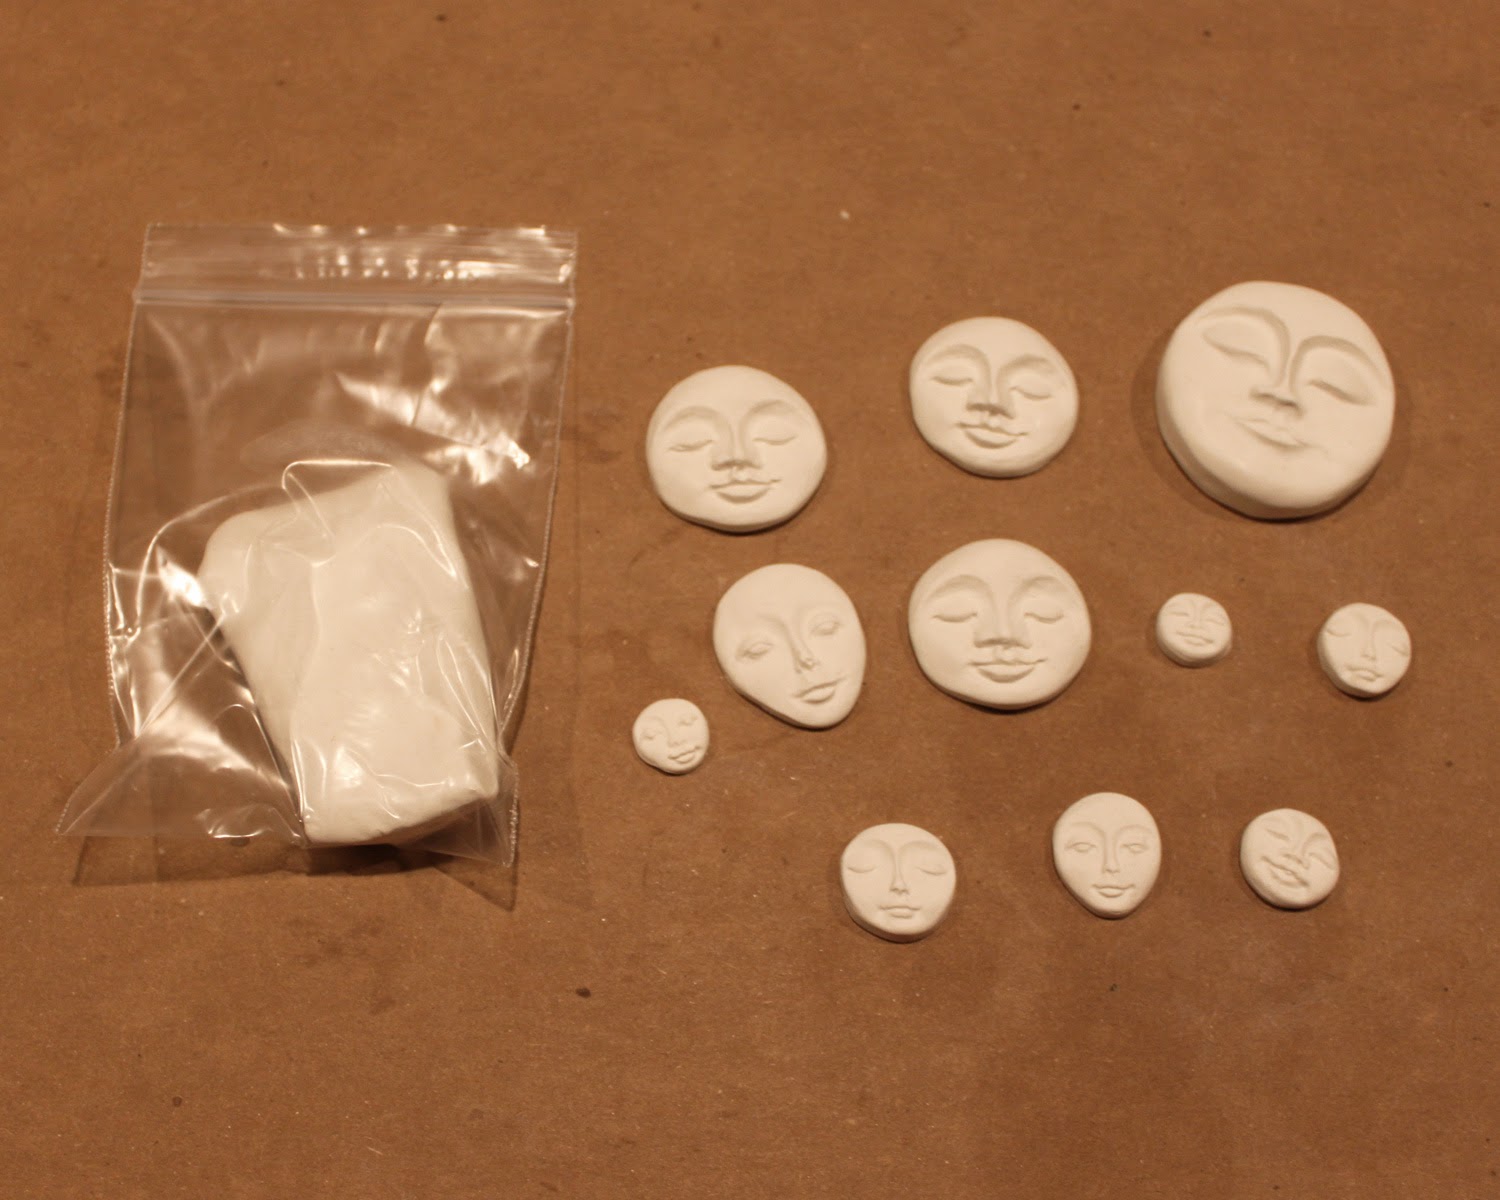
Here are my final faces baked and ready to go. I put my extra clay in a baggie. For under $2 in clay I made several cabochons and had more than half left over! I was especially impressed by how SMOOTH the Sculpey was before and after baking. Not a single crack or craze. I can wait to use it again!

My next step was to plan the other two heads. I used a vintage bottle cap with a 25mm clear cabochon for one, and one of the flowers from our Flower Pin set for the other. Also with a 25mm clear cabochon. I ended up using some Doll Head Paper Cuts afterall, but in a different way. I attached the clear cabs using Diamond Glaze, and once dry, cut them out and assembled them. To finish the clay face, I painted it with gold acrylic paint and added a bit of Inka Gold. The paint covered the clay beautifully with one coat.
Remember those glasses from last week that I didn't end up using? They were PERFECT for my little clay face! Squuueee!
Remember those glasses from last week that I didn't end up using? They were PERFECT for my little clay face! Squuueee!

Once the heads were done, I covered the bodies and wings with vintage music sheets that a friend gifted me. Thank you Melodee!!! I used Matte Glue N Seal.

I added color to the wings with my Peerless Water Colors and added strips of the Retro Grunge Collage Sheet to my Angel Bodies. Then of course trimmed and sanded them up.

I was tempted to do my usual inked edges, but in the spirit of trying new things, I added outlines with my Signo pens instead. Check out the "shoes" and "socks". Adorbs!

Finally I assembled the rest of the bits and attached some silver wire! Other than the heads, I didn't really have a plan but somehow it all came together, and I'm in love with them! I can see how the Extra Large Dolls (some are 12"!) would be real show stoppers! Big or small, they are huge fun!

Inspiration By Diana Darden!
And for some Halloween Doll fun, check out this amazing Witch by Diana Darden! I love the fun pop art look she has going on. Fabulous piece Diana!

Inspiration By Gerri Herbst!

Inspiration By Kim Rayko!
I'm loving this Spooky Theatre created by Kim Rayko! So many amazing bits to look at. Awesome job Kim!

Inspiration By Amy Nieman!
This sweet Dollie Shrine Ornament is by Design Team Member Amy Nieman! Proof that Halloween doesn't always have to be scary. Sometimes it's adorable! Love it Amy!

Deer Mount Ornaments!
The delightful Deer Mount Ornaments from last week are now posted to our blog so you can access the step-outs anytime. Find it HERE.

More Angel Inspiration!
I hope you enjoy playing with our new Primitive Angel Art Doll Kits! I know I had a blast!
For even more Angel inspiration, you can check out our swap photos from last year on Facebook. The angels are different of course, but they may give you some fun ideas!
xoxo Kristin

No comments:
Post a Comment
We appreciate your comments!